About automotive simulation
As you already know, simulation in the automotive industry has become essential in the development of new vehicles and products. This is due to the fact that simulation allows the actors of the automotive the industry to design, test and validate their products without the need for expensive physical prototypes. It thus allows them to multiply the number of hypotheses and possible designs for the same product.
If this is true for the global reliability of the vehicle, whether we are talking about its mechanical properties, its power efficiency (gas consumption, aerodynamics, etc…), or its ability to detect different obstacles thanks to its sensors and detections algorithms, it is also true for the aesthetics of the vehicle. In fact, for the final user of the vehicle, depending on the vehicle’s targeted market, it is as important to have an efficient and reliable vehicle, as it is to have a vehicle that looks nice.
This part of the product is taken care by the designers team who has to handle the interior as well as the exterior. During its iterations, this team has many choices to make: colors of the exterior and interior, the different materials used, the shape and size of the different parts, and so on. This is where simulation can help make these decisions.
The philosophy around SCANeR studio is that all its features can be used simultaneously. This allows you to combine different aspects of your project, without being concerned about their levels of completion. Concretely, it means that you are able to use the vehicle’s dynamics you developed, along with the different sensors and ADAS systems, and with the cockpit you are developing, in order to put a driver in the simulation loop, and make them interact with the vehicle.
The importance of photorealism in automotive simulation
Although SCANeR allows you to gather every team of a vehicle project around the same tools, in order for it to be completely relevant during the DiL tests, the immersion into the simulation has to be as deep as possible for the results to be optimal and to be able to make decisions. When the driver enters the simulation, they expect their senses to be tricked into thinking that the situation is real.
There are some factors we can play on:
- Here are the key ones: type of the simulator, motion cueing, vehicle dynamics, virtual scene.
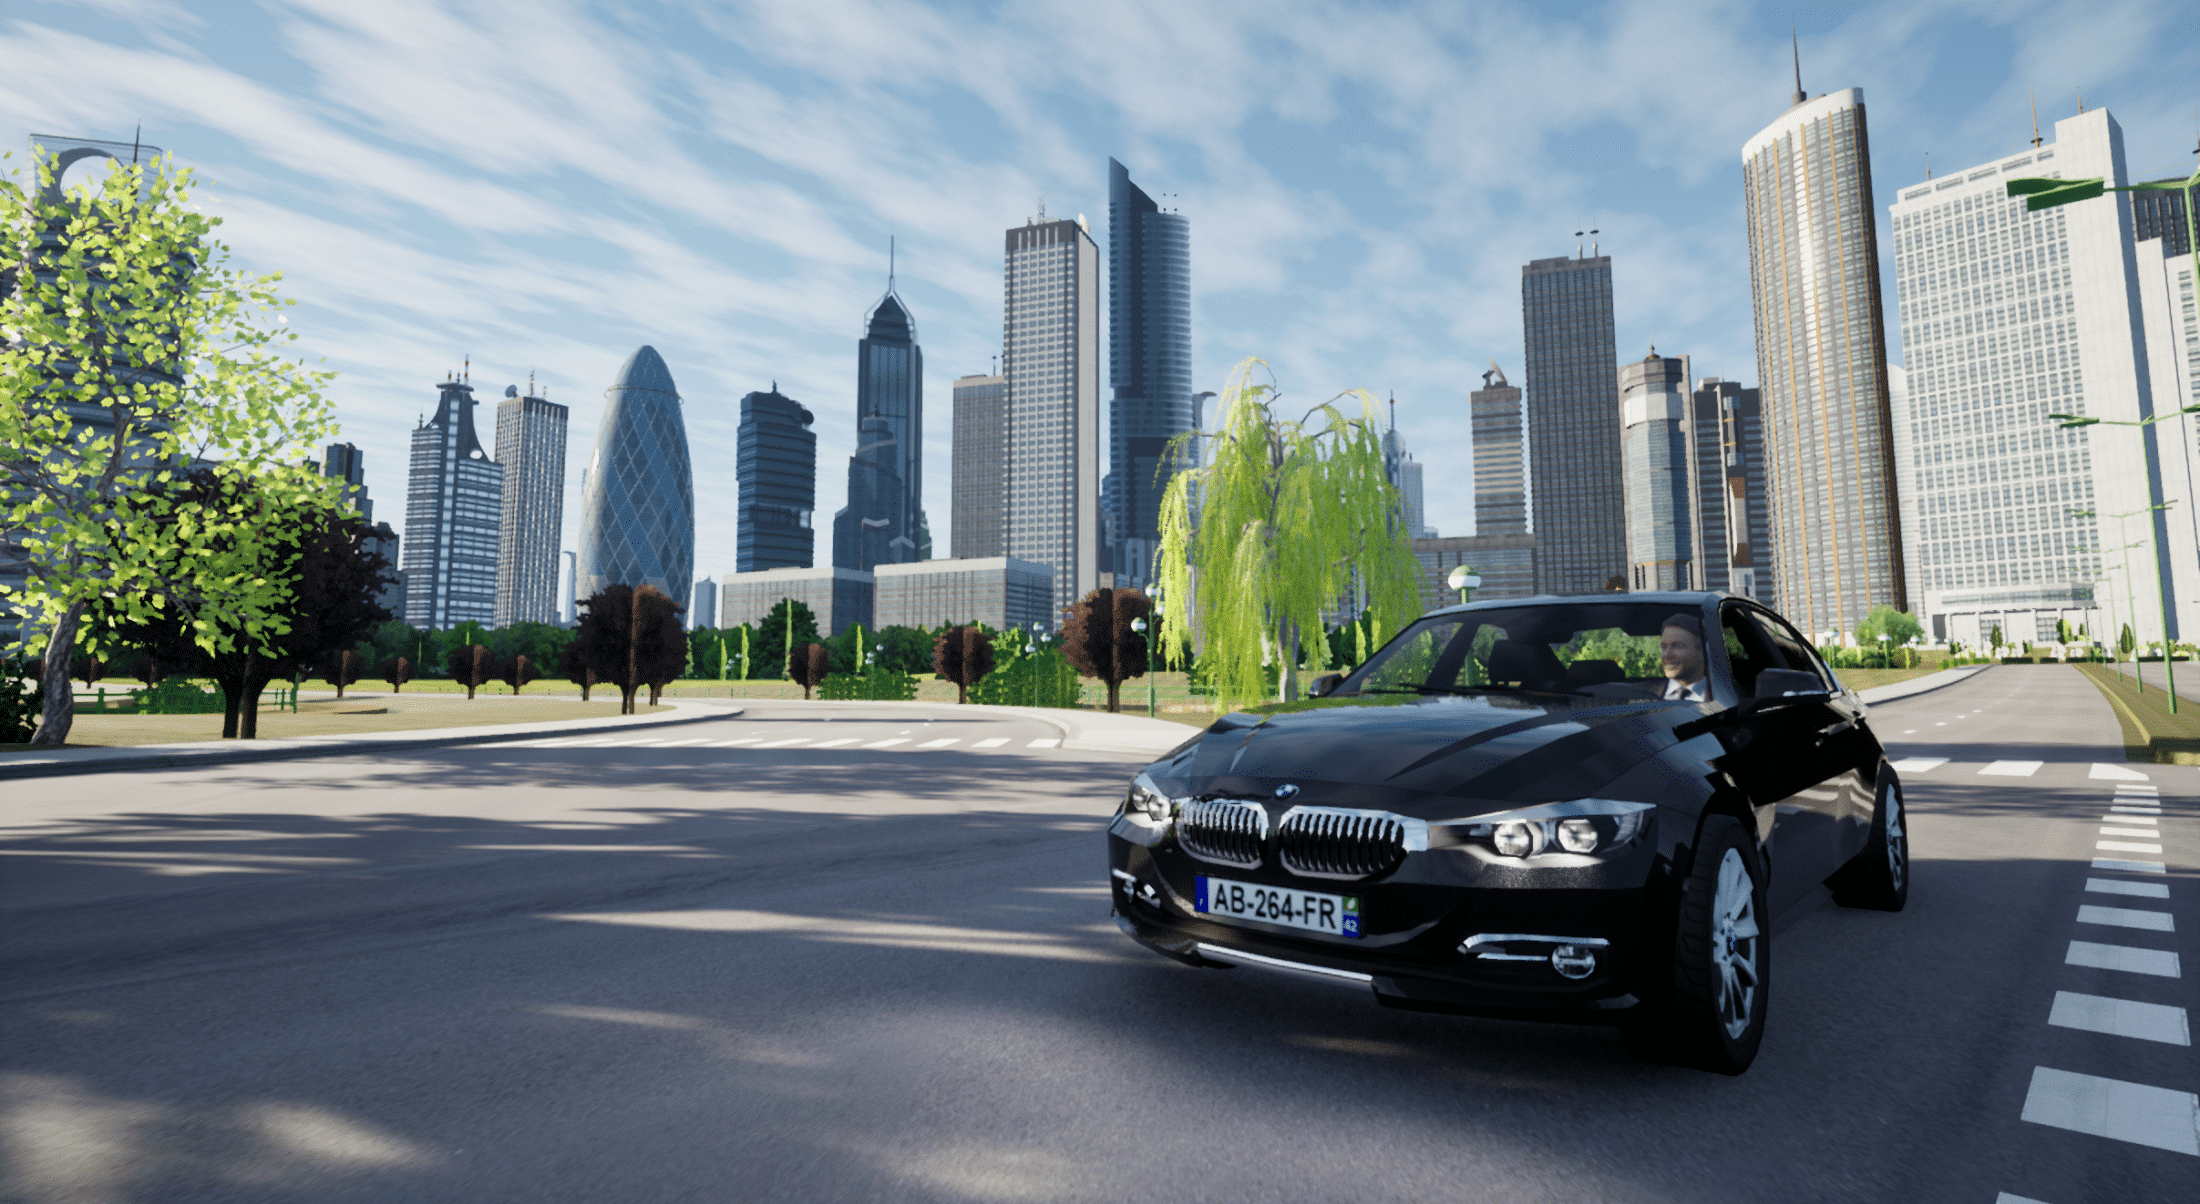
The quality of the virtual scene is the main subject of this article. It includes the quality of the 3D models, the quality of the textures applied to them, the amount of information contained in these textures, and the coherency of the environment in which the driver evolves. If the combination of these elements is used well, we can then focus on photorealism during simulation. This aspect of the simulation is one of the most important, because this is the first thing that the driver sees. If the environment in which the simulation takes place is not realistic enough, the driver’s immersion into the simulation is reduced, it will impact the experimentation’s result quality, and it might induce “simulation sickness” and more. Furthermore, the performance of the visual rendering plays as critical a role as the scene’s photorealism (120Hz). A lower performance means lower frames per second, and thus a stuttering image. This also reduces the driver’s immersion. Thanks to SCANeR’s image generator based on UXD Engine users benefit of the most advanced graphic rendering engine currently available (it natively supports physics-based rendering!). Thanks to the SCANeR open and modular architecture, UXD Engine has been optimized to run along with SCANeR, so users are able to achieve high framerate easily while taking advantage of advanced raytraced rendering:
- Ray trace reflections, shadows, translucency, ambient occlusion, image-based lighting, and global illumination
- Dynamic soft shadows from area lights, and ray-traced light from HDRI skylights
- Atmospheric Sun and Sky environment
- Volumetric fog & clouds
- And more
Lighting and ray-tracing
To go always further SCANeR Includes natively physical definition of materials high quality filters/materials to easily complete definitions made within Unreal: Base color (e.g. photograph), roughness, metallic, and specular.
To improve immersion of the driver but also to provide advanced rendering images to your System Under Test (e.g. camera injection, over the air and more) we now include specific features such as: post-processing, eye-adaptation.
The closer a scene is to reality, the more the tests can be trusted, and help decision making during a project. AVSimulation works with Konrad to offer to SCANeR customers out-of-the-box solution for camera injection and over the air. Below is a video of our last integration. Please note that this video capture was made on the historical image generator based on Open Scene Graph. What is interesting to note is that before the photorealism of SCANeR UXD Engine SCANeR virtual scene/scenario were rich and representative enough to convince a System Under Test. This simulation is a closed-loop simulation.
The principle of operation is simple:
- The system under test is placed in front of a screen.
- The simulation is run with a visual rendering module and a representative scenario, showing the situation to be tested.
- The ADAS systems is fed with the representative information coming from the screen, and uses if to make decisions and generate commands for the vehicle.
- The simulation takes into account these commands, and updates live the position of the vehicle in the scene, so we have a loop between the system under test and the simulation.
How to achieve photorealism with SCANeR studio
First of all, SCANeR studio is a complete simulation tool, with which you are able to create environments, vehicles, pedestrians, etc. and integrate these elements into different scenarios. The first step in order to achieve photorealism in SCANeR studio is to access the Terrain mode, and build the virtual terrain so it is as realistic as possible in terms of arrangement of the different elements. This is really important, because a realistic environment enhances the perception and immersion of the driver.
The terrain mode provides features to directly import the logical road of your environment from data in Open Street Map format, TomTom HD Map, and many more file formats, and even the 3D can be imported with OpenDrive and a coordinate table.
When you are satisfied with the logic of the road, you can add the 3D assets that will compose the surroundings of the road. These assets include buildings, road signs, any kind of infrastructure, vegetation, and so on. Keep in mind that the photorealism of your simulation, and thus the results of it, directly depend on the quality of the 3D assets you put in your terrain.
Also, keep in mind that since our release of UXD Engine, our 3D rendering engine based on Unreal Engine, we also provide a template project that allows 3 levels of customization:
- Automatic conversion of the existing terrain:
The ways we designed UXD Engine allows it to use existing terrains and convert them on-the-fly to assets compatible with Unreal Engine. This means that every terrain previously made with SCANeR can benefit from the leap in 3D rendering that UXD Engine provides.
- Customization of existing terrains:
Thanks to the template project for the Unreal Editor we provide, you are able to import existing terrains in IVE file format, and enhance them either with your own assets, or those available on the Unreal Marketplace.
Here are some pretty astonishing and free assets you can find on the Unreal Marketplace to enhance your terrains:
Downtown West Modular Pack: an American downtown city environment with which you can enhance your terrain.
- Create your terrain entirely in Unreal Editor:
You can also choose to only have your logical road into SCANeR, and create the rest of the terrain with the Unreal Editor directly thanks to the provided template. This way, you are able to achieve the maximum level of detail, and customize the environment completely. You can even add features to your projects that are initially not in UXD Engine, and use your project instead of UXD Engine.
Along with your photorealistic terrain, the actors surrounding the ego vehicle also have to be realistic enough. Once again, thanks to the openness of SCANeR and the UXD Engine, you are able to add your own assets to the simulation.
Of course, SCANeR offers the possibility to customize your simulation environment yourself, but AVSimulation also provides services especially designed to answer to your customization needs. Feel free to consult our page dedicated to services. We also provide some ready to run photorealistic environments. Here are some examples:
| After following these different steps, if the assets used during the terrain creation are qualitative enough, you will achieve a good level of photorealism, and the results of your simulations will be optimal for each and every use case that you are addressing with SCANeR. |
Written by Nicolas Mandadjiev.
If you enjoyed this article and would like to test SCANeR, and its customization capabilities, please do not hesitate to request a free trial license.